My Blessed Family!

My Blessed Family!

Monday, May 28, 2012

Memorial Day Dinner with the Family~

Hope everyone is having a wonderful day.  It was so nice spending 2 whole day with my husband and kids; don't get that very often.  We rested alot and got alot planned out for vacation.  But we also spent sometime in the kitchen.
Lunch time we had homemade fried Mozzarella Sticks.  Dinner was ribs and corn on the cob grilled up on the BBQ pit.  With creamy rosemary potatoes.  Topping it off with dessert of homemade molton chocolate cake.  What a wonderful day of food.

Fried Mozzarella Sticks

Do you like the Mozzarella sticks at Sonic?  You will have to make these if you answered yes.  These cheese sticks tasted better than Sonics. 
We wanted to make these for lunch but we didn't have all the ingredients so off to the store James went.
Yep, that's it.  Marinara sauce, string cheese, flour, eggs, parsley flakes, milk, and panko crumbs.  Not alot, huh?
Start off by cutting your string cheeses in 1/2.

Put your flour in one bowl, your eggs and milk in another bowl, and your panko crumbs and parsley flakes in a separate bowl.

We are going to start by placing one of the half's of the string cheese in the flour. 


Then put it in the egg mixture.


Lastly (is that actually a word?) put it in the Panko crumbs.


Now place it on a cookie sheet.  Continue with the other half's; flour, egg, panko.  Flour, egg, panko....I think you get it :)
When you are done your fingers will look like this:
Oh how lovely.
Once you have completed all of the string cheese half's and they are all placed on a cookie sheet.  Pop them in the freezer for about 20-30 minutes.  Don't skip this step.  If you do; then will be a good chance that the cheese will melt in the hot oil before the outside crisps up.

Now that the 30 minutes is up get your oil heated up.  I started out heating up the oil in my fry daddy...well that wasn't working.  For some reason the cord wasn't staying in there.  So Plan B...I put some oil in my wonderful iron skillet and fried them in there.  I placed about 5 or 6 of them at a time once the oil was all heated up.

Turn them on the other side after a few minutes.  It won't take long in that hot oil.  Once you have them all cooked you have wonderful Fried Mozzarella Sticks.


Creamy Rosemary Potatoes

I know I've made a different type of scalloped potatoes and have blogged about it.  So I was really iffy about blogging about this one.  Once I got all my ingredients out and ready to go...I thought...why not.  These are different than the other ones I must share.
The ingredients are pretty much the same as the other ones, but these have cream cheese...YUM.  Those must be good.  Now let's get started.
Take a cup of 1/2 and 1/2 and a cup of heavy cream and combine them.
Place your potatoes (make sure that they are thinly sliced) in a big bowl and then drizzle half of the cream mixture on top....set aside.
I then melted the butter in my iron skillet and then added the onions and chopped garlic.
Once those were translucent  looking I added in the 8 oz. of cream cheese.  Heated that up and melted it until it was nice and smooth looking.  Then added the rest of the cream mixture in.  Keep stirring....don't stop.  Mix it well.
Now that you have mixed it well add in your salt, pepper, and rosemary, and green onions.


Add about 1/2 a cup of cheese (I used mozzarella cheese) and mix till melted.
Remove from burner and set aside.  Take your potatoes that have been soaking in the cream mixture and place them in a buttered 9 x 13 dish.  Pour on the cream mixture from the pan right on top of the potatoes. 
Spread it on there evenly then sprinkle more cheese on top.  Bake in the oven for about an hour.
Oh how wonderful it smells and looks when it's done.


Molton Chocolate Cake:

You know the Folgers song....The Best Part of Waking Up; It's Folgers in your Cup.  Well that's what I say about dessert.  Sing it using the same theme music.  The Best Part of Dinner is; dessert afterwards. :)

I just love dessert.  Mainly when it's Molton Chocolate cake.  Oh just the sound of it is wonderful. 
My daughter wanted to help make this so here we go.


Melt the butter (1 stick) and chocolate (semi Sweet Baking Chocolate  - 4 pieces) in the microwave for about a minute. 
Don't melt it till the chocolate melts...just the butter.
Once the butter is melted whisk it together till the chocolate melts.  You don't want to over melt...if that makes any sense :)
Stir in the Powder Sugar (1 cup) until well blended.  Whisk in your eggs (2 whole eggs) and egg yolks (2 egg yolks).


Stir in your flour (6 TBSP). Mix well.
Divide the mixture up between 4 custard cups (make sure to spray them real good). 


Bake at 425 degrees for about 13-14 minutes.  You want the sides to be firm and the center to be soft.  Remove from oven and let stand for 1 minute.  Take a plate and place on top of the dish.  Flip over.  Then you have a wonderful Molton Chocolate Cake.


Don't forget to add the vanilla ice cream.

ENJOY!!!

Here are the links to the recipes.  The link for the potatoes is different than the one in my cookbook. 

Easy Beef & Bean burritos

Happy Memorial Day to you all.  Much respect for all those who have fought for our country.  God Bless you all!!
It's not very often I get alone time, so I'm taking advantage of this time to get my blogging done.  Oh man....spoke too soon.  Here comes my daughter downstairs and my husband in the front door.  No more quiet time here.

Dinner on Sunday night was Beef & Bean Burritos.  The easiest beef and bean burritos I've ever made.
Not much ingredients are needed for these:
Ok...that does look like alot, but you don't need that can of tomato sauce; not sure why that was even there. 
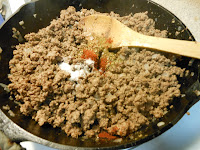
Fry up your meat with your onions, you want to make sure that your onions cook to where they are completely done.  So it's good to fry them up with your meat. 
While your meat is cooking let's get our refried beans in a pot warmed up.  Once that is heated up thoroughly add in your cheese.

Now that looks good just by itself, don't it?  Mix that up till the cheese is melted.  And by this time your meat should be done.  Drain the fat off of it.  Then place it back in your pan.
Add in your seasonings and mix well.  Now add in 7 oz. of the enchilada sauce.


Stir in the enchilada sauce and let it simmer for a few minutes.  In the recipe it says that you can use tomato sauce, oh...that's why I had that in my picture.  But I decided to go ahead and use the enchilada sauce. 
We can now get our assembly line going.
Microwave your burrito size tortillas for about 1minute. 
Place your warmed up burrito on a flat surface.  Take a spoon full of refried beans and place in the middle of your burrito.


Now place a spoon full of the meat mixture on top of the beans.


Just for giggles and grins place some shredded cheese on top of that.  Let's test your folding skills.
Take the top and the bottom and fold inward.
Now take the side and fold it over, tightly.  Then just roll it.  I know it's easier to say than do it.  Place it on a microwavable plate.

Drizzle some enchilada sauce on top and then more cheese.  Place it in the oven for about a minute until the cheese is melted.  Then wal-lah (I know that's not a word, so I'm sure it's misspelled, but it's all good).

That's looks yummy.  I'm not sure what it tasted like cause this was for the kids.  My husband and I put our own spin on it.  Earlier that day we had cheese dip (rotel and Velveeta Pepper Jack cheese).  So we took that and placed that ontop instead of the enchilada sauce.  Then sprinkled more cheese on it.

Then again...wal-lah :)

I know these tasted wonderful!!!!!!
Here is the recipe...enjoy! Click here for the Beef and bean burrito recipe.


Saturday, May 26, 2012

Broccoli Cheese Soup & Sour Cream Noodle Bake

Don't worry I did not make the Broccoli Cheese Soup and Sour Cream Noodle Bake in one night all at the same time for dinner.  I don't think that would of been a good combination.
I actually made the broccoli cheese soup on Friday night and then the Sour Cream Noodle Bake tonight. 
Let's get started.

BROCCOLI CHEESE SOUP

Not alot of ingredients....4 heads of broccoli is alot though.

I've been wondering if you have noticed the quality of my pictures.  No more using my phone for picture taking.  My wonderful husband bought me a great camera, and boy do I love it.  It takes great pictures, don't you think?
I diced up the onions really good, melted the butter in a pot and then added my onions.  Sauted them up real good and then added in the flour.
Stirred that up and let that cook for a couple of minutes.  Now it's time to add in the good stuff.....Milk (4 cups) and 1/2 and 1/2 (2 cups). 
Be sure to stir it as you add it....and take a picture.  Not sure how I did that.  That's where being a mother and being able to multi-task came in handy.  :)
Add in your nutmeg, well I didn't have any so that step got skipped on my part.  But I think that the nutmeg would of gave it more flavor.  That's a question for my mom to answer cause she has made this and I'm sure she used the nutmeg...
Toss in the broccoli now.
That looks good already.  You know I think the only healthy thing in this was the broccoli.
Add in your pepper....lots of it....and stir it together real good.
Cover and simmer for about 30 minutes.  Just until the broccoli is no longer crunchy.  Now is the time to add in the other good stuff.  CHEESE.  3 whole cups of cheddar cheese.  Yum!


Stir it up..add more cheese if you want.  No not really 3 cups is alot of cheese.  You see my fork there?  That's my taste testing fork.  Everyone knows how I am about taste testing. :)
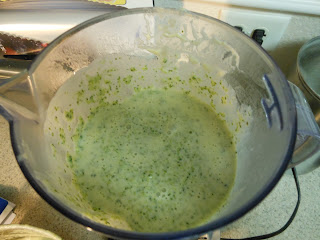
At this point you can leave the soup like it is, or stick it in the blender and puree it.  Don't purify it like I was saying all night..LOL
Now it's time to dig in.

I try to remember to add the link for the recipe for your use.  So here is the one for the Broccoli and Cheese Soup.
Broccoli & Cheese Soup Recipe


SOUR CREAM NOODLE BAKE

Where do I begin with this one?  Ummmm...Do you like lasagna?  This is almost like lasagna; but it's got noodles and not the long noodles.  Hope that makes sense.
My daughter stayed in the kitchen the whole time with me and helped me out alot.  It was great having her there beside me.
She helped me get all the ingredients together:


Take your meat and brown it till it's completely done.  Drain all that yucky fat off and then add in your tomato sauce.
FYI: Opening of the cans was compliments of my wonderful daughter

Stir that together real good then add in your salt and pepper.
Man....I missed something.  While my meat was cooking I decided to go ahead and get my noodles cooking in some hot water.  Well duh....what else would you cook them in?

Now back to the meat.  Let that simmer till you get everything else done.  Once your noodles are done you can drain them and then place them back into the same pot.
In another bowl combine your cottage cheese, sour cream, and a good amount of pepper.


Once you have that combined together add that to your noodles and mix well.  Add in your onions.  Mix well.

Now it's time to assemble your noodle bake.

I used a 9 x 13 pan.  Take 1/2 of your noodle mixture and place on the bottom of the pan.  Take your meat mixture and place 1/2 of that on top of the noodle mixture.  Then sprinkle cheese on top of that. 
Take the remaining noodle mixture and place that on top of the cheese.  Then the rest of your meat mixture.  And top it off with more cheese.

Bake at 350 degrees for about 20 minutes.  Once those 20 minutes are up....your Sour cream noodle bake will look like this.


Me and my best friend have great minds that think alike.  Cause she made this exact same thing tonight.  Love that girl!!!

Enjoy!

Here is the recipe:

Friday, May 25, 2012

The Best Chicken Pot Pie Ever

Some people have mixed feeling about chicken pot pie....not sure if it's because of the looks.  So because of that I'm going to start this off with the final picture....and oh it looks tasty.

Yeah I had to bring out the fine china again.  But doesn't that look good?  Here's how you make it.
I usually start off with the ingredients.
This is for the filling:

This is for the crust:


We will start off making the crust first.  Take your flour and salt and place in a big ol' bowl.  Then take your vegetable shortening....and yes what's there in the picture is NOT enough.  If you use that type you will need 1 1/2 sticks.  Use your pastry cutter and cut in the shortening.
Once your shortening is all cut into your flour mixture...it will resemble like little pebbles.  Crack an egg into a separate bowl and beat just a little bit.  Throw that into your mixture and add in your water and vinegar.  Have I ever told you how much I just love the smell of distilled vinegar.  Not sure why, I know that's strange.  But something about it, I just like that smell.  Just like Play-do....I like that smell too.  Sorry off track here.
After adding in your liquids now it's time to mix it up till it's combined.

Now separate that into two half's.  Place each half in a separate plastic baggie, do not close it.


Use your rolling pin and flatten it.  I think I flattened mine too much....but we live and we learn huh?
If you aren't using these right away, which for this recipe you will only use one of them; they can now be placed in the freezer.  When you get ready to use them they will need to thaw out for about 20 minutes before you can use them. 

Now onto the filling :)
I cheated and used a rotisserie chicken from WM, lemon and pepper...just thought it would give the pot pie more flavor.  Was I right about that.
I should have turned the picture so you didn't have to turn your head sideways to look at it.  Sorry!

I deboned the chicken and set aside.  Got a big pot and started melting the butter.  Once the butter was melted I threw in the celery, carrots, onions, and peas. 

The celery, onion, and carrots were cut up really small.....just so they aren't crunchy.  I cooked those for a little bit, just till my onions were translucent.  Then I threw in the chicken....stirred......sprinkled the four over the veggies.....


Stirred that in real well and allowed it to cook for a few minutes...not long though.  Then I poured in the chicken broth.  Stirred it up.  Make sure to stir it constantly.  Then stir in the bouillon cube.  The flour will combine to create a wonderful yummy gravy.
Now is the time to really get the good stuff in there.  Stir in the cream.
Let the mixture cook for about 4 minutes.  Season with Salt, Pepper, and Thyme. 
Stir it up real good...remove from heat.  TASTE!!!! Yeah I sure did say it....us cooks have to taste test our food before serving to others. :)
Don't taste test too much though...cause then by the time dinner arrives you will not be hungry.  Trust me I know from experience.
Pour in the chicken mixture into a deep pie pan.
That already looks good enough to eat.
Let's finish our dough though.

Take it out of the baggie and place on a lightly floured area.  With your rolling pin start from the center and roll out.  Make sure to roll out the crust so that it's at least 1 inch larger than the pan. 
Place your dough onto of the mixture.

Please don't be judging me on the looks of my crust..LOL
Make it pretty it doesn't matter....you're going to eat it either which way.  Pretty or really messed up looking like mine.
Bake at 400 degrees (oh forgot to mention preheat the oven...but if you are cooking you know to do that) for about 30 minutes or until the crust is golden brown.  Once done allow it to cool for about 10 minutes.
Then you have a really pretty Chicken pot pie:


I will share the recipe with you...but she used turkey...I would rather have chicken. 
ENJOY!!
CHICKEN Pot Pie :)