My Blessed Family!

My Blessed Family!

Saturday, June 23, 2012

Homemade Chili

Some people say it's too hot to eat chili during the summer.  I just don't understand that; cause you are in your home in the air conditioner so what does it matter?  So obviously I don't agree with that statement so I made chili this eveing for dinner.  It was very quick to throw together just has to simmer for an hour; but other than that it's quick.

Here's what you need:

I know I've said this before but it's so much easier to have everything in bowls ready to just throw in the pan.  More dishes to wash; I know; but it's easier to prepare your dish this way.

Brown your meat witht eh chopped garlic.
Once it's done and all brown drain all that fatting grease out.  Place it back into the pan; that's if you are using a colander.  Put your tomato sauce in there and your seasonings.
Stir to combine well.  Place the heat on low and simmer for an hour. Stirring occasionaly.  If you see that it's getting dry add water to it 1/2 a cup at a time. 
La La La La....I could sing to you while we wait an hour.  Let's not though...I'll go ahead and finish the explaination.  Good choice huh?
Once your hour has passed mix 1/2 a cup of water in with your masa; stir together well.  Then add it to your chili.

Stir to combine.  Here is where I added more water; cause I don't like a thick chili I want it a little on the soupy side. You can leave like this; which is what my daughter prefers.  Or you could go ahead and add in some beans to it. 
I let the beans heat up just a little bit then it's serving time.

Looks a little cheesy huh?  That's cause I added shredded cheese to my bowl. Don't that look good????  If so click here for the recipe!
After looking at that recipe it's different than what I made; but it's close enough. :)

Father's Day Cake

That's the best lookin' chocolate cake I've ever made.  3 layer's with the icing homemade....it tasts devine.

We are going to start on cake part.  First butter 3 round cake pans then dust with cocoa baking powder.

In a mixing bowl combine sugar, flour, and salt.

In a saucepan melt the butter and then add in the cocoa powder.  Stir together well and then add in the boiling water.  Allow to boil for about 30 seconds then pour over the sugar/flour/salt mixture.  Stir together well and allow to cool.  Well if you do that you'll be waiting for a long time.  So just while you slowly stir it all together the flour will allow the chocolate mixture to cool.
In another bowl combine the buttermilk, baking soda, vanilla, and beaten eggs.  Once combined stir into the chocolate mixture.  Stir well.
Divide the cake mixture evenly between the cake pans.  This recipe is actually a 4 layer cake...so if you do just a 3 layer be aware that you will have cake batter left over.  I made the 4 layers at the beginning then realized that it wasn't going to fit into my container that I was storing the cake in; so 1 layer didn't get used.

Bake your cakes for 20 minutes.  While they are baking you can prepare the chocolate curls.

Combine 3 ounces of semi sweet chocolate and 1 tbsp. of all vegetable shortening into a microwavable dish.  Microwave until the shortening is melted; about 30 to 45 seconds.  Stir with a fork until the chocolate is melted.

Now get our a cookie sheet and turn it over to the bottom part.  Pour out the melted chocolate on it.


Silly I know!!!  Spread out into a thin layer....


 Place into the freezer for a few minutes after a few minutes check it and you will know when it's done when it leaves a slight finger mark.  Once done get a sharp spatula and scrape it....                                                


Trust me this was something I was really ready to give up.  But this proves that you don't give up..keep trying and you can do it. :)
Once you have all your curls done place them into a baggie and back into the freezer to keep cold. 
Let's make the frosting now.
Take 24 ounces of semi sweet chocolate.  I think it's best to use the semi sweet chocolate pieces; so then there's no cutting involved.  Getting the pieces is the easy way out; don't you think?
Place your heavy cream into a pot and heat up till very hot.  Once it's hot then pour over the top of the chocolate pieces.  The heat of the heavy cream will allow the chocolate pieces to melt. 
Stir together until completly melted then place into a mixing bowl and then into the fridge to get cold.  Once cooled off completly add the vanilla extract in it.
Then mix until light and fluffy.
That looks good just to eat by itself.  Well my husband thought it did too....and nothing stopped him.  He just dug right on in.

It was Father's Day I couldn't tell him no.  Yes honey go right on ahead just don't stick that spatula back into my icing...that's double dippin'...

Make sure that your cake is completly cooled off before icing.  I acutally stuck my in the fridge...it seems to have better results that way.
Time to ice the cake.
Place one cake layer face down; just so you have a flat surface you are working with.  Ice the top of that layer. 

Then place another layer on top of that face down and then ice that; don't worry about the sides right now we will get that at the end.
Keep doing that till you use 3 layers or even all 4 layers.
Once you get to the top put more on top and just scoot it all to the side it will slide down the side and fill in those cracks.  Ice the sides till you have the whole thing done.  Then place your chocolate curls on top of the cake.
Now you can eat it with a scoop of vanilla ice cream or what I did was just ate it like that; it's all I needed.  Except the glass of milk to go with it.


ENJOY!!!!!


Dinner for the Doyles

Dinner for the Doyles consisted of grilled pork tenderloin (which will not be included in this blog), corn casserole with red peppers and Jalapenos, twice baked potatoes, and homemade M&M cookies for dessert. 
If you are asking yourself who are the Doyles?  They are some wonderful friends of ours that moved to Kansas so we invited them over for dinner before they left. 

Let's get started....

Fresh Corn Casserole with Red Bell Peppers and Jalapenos

So here we have; 8 ears of fresh corn, diced red bell pepper, diced jalapeno, heavy cream, milk, butter, and I just noticed I didn't have the salt and pepper in this picture.  Well now you know...salt and pepper. 
Remove the corn from the husks.  Try real hard to get as close as you can to the cob so that you get all that creamy stuff.

Be prepared it will go everywhere; I have a picture to prove it.
Place all your corn in a bowl; add your red peppers, jalapenos, heavy cream, milk, salt and pepper, and butter.  Mix well. 
Once you have it mixed all together pour it into a 9 x 13 baking dish and bake for about 30-45 minutes. 
When you pull it out of the oven you will have this wonderful smellin' dish.

Twice Baked Potatoes

I'll make you really want to make these and show the final outcome before hand!!  I'll enlarge it so you can really see these...


Start out by rubbing canola oil on the outside of your potatoes.  Bake at 400 degrees on a baking sheet for about 45 minutes till the potatoes are cooked inside and the skins are slightly crispy.  During the last 10-15 minutes of baking start on your bacon and get all that fried up and diced up when done into little bits.
Take a big ol' bowl and toss in the butter, sour cream, bacon, milk, seasoned salt, and pepper.
By this time your potatoes should be done; while still hot cut each potato in half lengthwise.

With a good size spoon scrape out the inside of each potatoe and place the insides into the bowl with the other stuff in it.
After you have scraped out all the insides of the potatoe and placed those in the bowl get your potato masher to mix the ingredients together.
Now stir in 1 cup of grated cheese and your sliced green onions.
Make sure to test it to see if you have your seasonings correct.  Fill each potato half with the potato mixture and place back on the baking sheet and place more grated cheese on top.

Bake for about 15 to 20 minutes until your cheese is melted and the potatoes are hot.
Then Dig in :)

Homemade M&M Cookies

These cookies are probably the best M&M cookies I've ever had.  So soft and yummy.
If you make these Trust me...they won't last long in your house; they are that good.

Preheat the oven to 375 degrees and grease your cookie sheets.  I used foil on mine and then greased them just cause my cookie sheets don't look pretty. :(

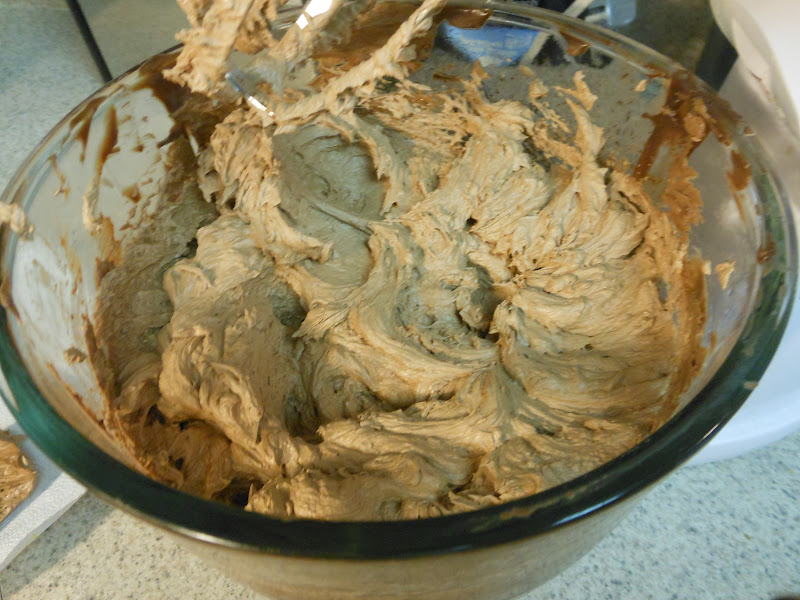
In a large bowl mix all ingredients together "except" the M&M's.  Mix together on Medium with the electric mixer, make sure to get the sides scraped and cleaned and mixed.

                                      
Here are the ingredients:
1 1/4 cup of all purpose flour
1/2 cup Packed light brown sugar
1/2 cup softened butter
1/4 cup sugar
1 egg
1 tsp. vanilla extract
1/2 tsp. baking soda
1/2 tsp. salt

Your mixture will look like this when mixed well together.


Now stir in your M&M's.
By spoonfuls drop onto the greased cookie sheet and place each one approx. 2" apart. 

Bake for 10 to 12 minutes until lightly brown.  Remove from cookie sheet and place on cooling rack to cool.  Well duh why else would you place them on the cooling rack; to do tricks?


I hope you have enjoyed all my wonderful recipes that I have made.  If you wish to make them here they are except for the cookies I don't have an actual recipe for that one.

Click here for the Fresh Corn Casserole with Red Peppers and Jalapenos

Click here for the Twice Baked Potatoes Recipe


Eggberts Sunriser and Grilled chicken with lemon basil pasta

Finally finishing up all my recipes from 2 weekends ago.  Finishing up just to have more this weekend :)  But like I've said before I don't like being behind.  But without internet access there's nothing I can do.
Breakfast on Saturday morning was Eggberts Sunriser.
Thought I would tease you with the final results first.  So not cool huh?
Here is what you will need for this:

The recipe doesn't call for bacon, but let's be honest with each other breakfast isn't breakfast unless you have bacon.  So here you have frozen hash browns, canola oil for frying, salt and pepper for tasting, onion, green bell pepper, suppose to be red but I used orange, diced ham, cheese, butter, and eggs.  For the bacon I used jalepeno bacon. 
Let's see how to make this...ummm...ok...let me pull out the recipe.  This old mind of mine just can't remember. :)
Fry up the hash brown according to what the package says.
Go ahead and get your bacon fried up if you are using bacon.  You could even use sausage if you want; it's all up to you.  Heat up 2 tbsp. of butter in a large skillet and then throw in the veggies.  Let those cook for a little bit and then throw in the ham to warm up.

Very colorful don't ya think?  Melt the other 2 tbsp. of butter in another skillet and let's get our eggs frying.
If you don't know how to fry an egg let me kinda explain.  Melt the butter, crack the egg into the butter, then fry till done.  I usually flip mine but you don't have to. 
Once you have fried all your eggs time to get it all assembled. 
Place your hashbrowns on the bottom.
Then the veggies/ham/bacon.  At this point this is what it looks like....
Then add grated cheese.

Oh how funny....you can see my PJ's...now you know that I relax when I cook.

Place it into the oven for about a minute or two until the cheese has melted.  Once the cheese has melted remove it from the oven and then place your fried eggs on top.  I added an extra kick and put more cheese on top.
The heat of your eggs will allow the cheese to melt.  Then you get the yummyness when it's done.
Is taht even a word...yummyness.  Well it is now; add it to teh dictionary.
Here is the recipe for you to enjoy as well: Click here for recipe!

Grilled Chicken with Lemon Basil Pasta

Dinner rolled around; well not right after breakfast but I'm not going to blog about sandwiches.  Not sure if there's a special way to make peanut butter and jelly sandwiches.  We decided to have grilled chicken with lemon basil pasta.  The chicken we used was an already seasoned lemon pepper chicken; thought it would work great for this recipe.  Here's a picture of the one I bought:

I just took those out and baked them until they were done.  Cooked my pasta; Oh I have a wonderful photo to share...

Ha Ha Ha!!!  After your pasta is done make sure to save 1 cup of the hot pasta water when you drain your pasta.  While your chicken is still cooking and your pasta is in a colander cooling off melt some butter in the same pot you cooked the pasta in.  No need in dirtying more dishes. 
Once melted squeeze in the juice of 3-4 lemons.  Whisk together.

Add in your cream and 1/2 and 1/2.  Every recipe I cook seems to have that in it.  That must be the good stuff in recipes.  Well I know it sure isn't the healthy stuff. 
Whisk and mix together till hot then dump in the cheese and whisk till it's melted.
Look at this; doesn't it look yummy?
Look at that cheese already dripping off the whisk.  At this point add in your salt and pepper and if the consistency is too thick add some of the pasta water that you saved at the beginning.
Pour in your pasta and mix together.
Sprinkle basil in and then this part is done.  Once your chicken is done slice that up and then serve with the pasta.
Enjoy!!!  Click here for the recipe!